Free Value Study Maker
Posterize any photo into 2–10 clear value steps with thresholds you control, and plan a painting's value structure before you paint. Exports PNG and PDF. Free, with no sign-up, and your picture never leaves your device.
Drop an image here, or paste from clipboard
Your image stays on your device. Nothing is uploaded.
JPG, PNG, WebP, GIF, AVIF or BMP
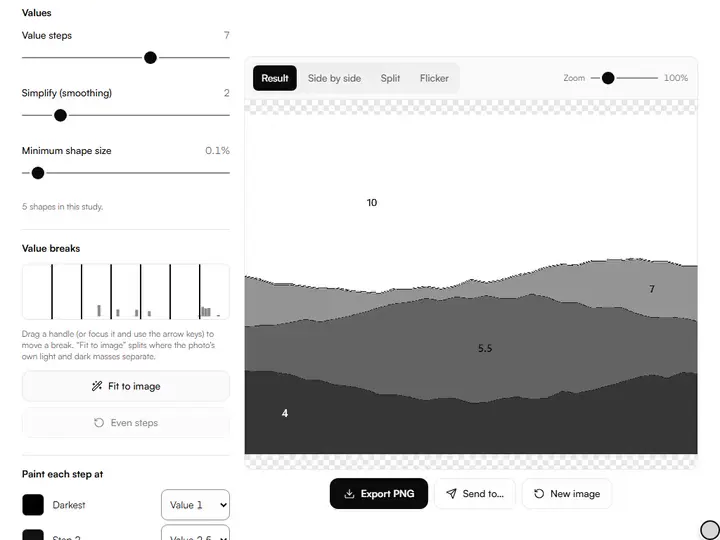
Value steps.Sets the study from 2 to 10 flat values, starting at 4, with even breaks until you drag them.
Simplify (smoothing).Blurs the lightness map, from off up to 12, before values are banded, so texture stops breaking shapes apart.
Minimum shape size.Merges patches under a set share of the image, 0.1% by default, into the shape around them.
Stencil pack PDF.Prints the study, then one sheet per value step with everything at that value or darker.
- Free
- No sign-up
- Runs in your browser: your image never leaves your device
What is a value study in painting?
A value study is a simplified version of your reference reduced to a few flat grey steps, used to plan the light–dark structure of a painting before you start. It lets you test the composition as pure design, without color or detail getting in the way.
How to use the Value Study Maker
The tool takes 8 steps, all on your device.
Drop or paste your reference photo, or click “Choose image”. Nothing leaves your device.
Set Value steps: 3–4 steps for a bold, poster-like study; 5–7 for a nuanced one.
Raise Simplify to melt away texture and detail before the values are computed. This is the digital squint.
Set a Minimum shape size to merge specks and noise into their neighbours so shapes stay designable.
Drag the handles on the histogram to place your own value breaks, or press “Fit to image” to split where the photo's own value masses separate.
Under “Paint each step at”, re-key any step to another value: the shapes stay the same.
Switch the View between Greys, Outlined (edges between value zones), Numbered (each shape labelled with its value) and Color masses (each shape filled with its average color).
Export a PNG, a printable PDF on A4 or Letter with the value legend, a stencil pack with one sheet per value, or a layered SVG.
What the Value Study Maker does
The Value Study Maker sorts a photo into perceptual value bands, sets their thresholds on the histogram, and shows the study in four views.
Perceptual value bands
The Value Study Maker bands a photo by OKLab lightness, a measure of how light each color looks, rather than by a camera's luma. Within our value and tone tools for artists, it is the planning step: it turns a reference into a few decided value shapes.
Thresholds on the histogram
The threshold editor draws the photo's lightness histogram under one draggable handle per value break. Handles stay at least 2% apart and move in 1% steps with the arrow keys (5% with Shift). Fit to image places the breaks by multi-level Otsu, where the photo's own light and dark masses separate.
Four study views
The View control switches between Greys, Outlined, Numbered and Color masses. Outlined traces a dark line wherever two value zones meet. Numbered writes each shape's value at the point deepest inside it, so a number never lands outside an L- or C-shaped area. Color masses fills each shape with its average color.
Steps you can re-key
Steps start evenly spread across the artist's 1–10 scale, so a four-step study reads as values 1, 4, 7 and 10. Paint each step at sets any step to another value without changing the shapes.
Exports at full size
Each export reruns the study on the full-resolution photo, so the PNG or PDF keeps detail that the on-screen preview leaves out.
Settings kept in the link
The Value Study Maker computes every study in your browser, and the photo never leaves your device. Steps, smoothing, shape size, view, paper, thresholds and step values live in the page address for bookmarking.
Worked examples from the Value Study
Each picture is what this tool exported from one of the sample photos you can load in it.
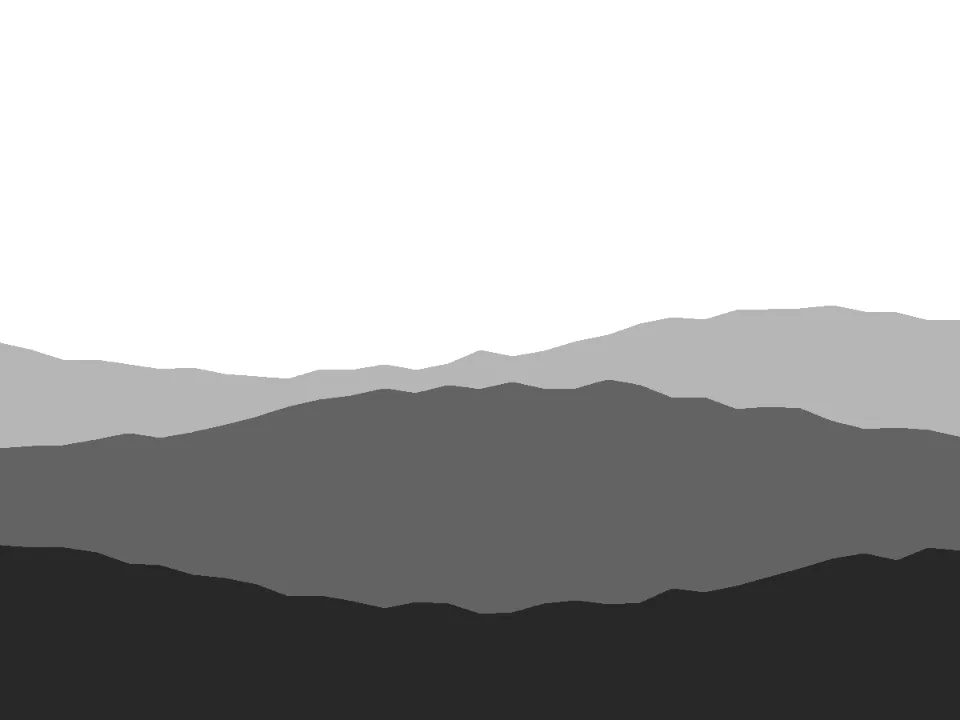
A landscape in five steps
- What was set
- The Landscape sample, Value steps at 5.
- Why
- Five steps are enough for sky, three ridges and the foreground to each take a value of their own, so the study already shows the picture's depth.

A lit sphere in five steps
- What was set
- The Portrait sample (a single lit sphere), Value steps at 5.
- Why
- On a rounded form the steps become bands: light, halftone, the core of the shadow, reflected light and the cast shadow. It is the classic form study, made from your own reference.
Artists who plan a picture before painting it
Working painters, art students, art teachers and illustrators all plan a picture's values with it before any paint goes down.
Working painters
Working painters can drag the thresholds until each band holds shapes they mean to paint as one mass.
Art students
Art students can make one reference at 3, 5 and 7 steps and compare how much each version decides.
Art teachers
Art teachers can print the A4 or Letter PDF, legend included, as a shared plan for a class value exercise.
Illustrators
Illustrators can export the Outlined view as a flat light–dark plan for ink or limited-color work.
What a value study is for
A value study answers the one question that cannot be fixed later: does the composition work as a few big value shapes? Color, edges and detail can change mid-painting; a broken value structure has to be scraped back.
The discipline is limitation. Force a reference into four values and you must decide where each shape belongs: is that half-lit wall a light or a mid? The choosing is the skill.
Choosing the number of steps
Two or three steps is a notan exercise: pure light-versus-dark design. Use it at the very start, when you are deciding whether a reference is worth painting at all; the notan generator is built for that two- and three-value test.
Four or five steps is the working study: a light mass, a mid-light, a mid-dark and a dark mass, plus the accent of the lightest light, few enough shapes to hold in your head while you draw.
Seven to ten steps approaches a full tonal rendering, useful for subtle form such as portraits; past about seven the study stops simplifying and starts copying.
The settings, explained
Simplify: start at 2–4, and go higher for busy references.
Custom thresholds move the value breaks themselves. References are rarely even: a snow scene needs its breaks crowded into the lights, a night scene into the darks.
Views: Numbered is a paint-by-values map on the same 1–10 scale as the Value Checker; Outlined is closer to a line-and-wash plan.
Further reading
The page below goes further into the ideas the Value Study Maker works with, and opens on the site named beside it.
- Value studies and composition planning (ArtisticMasterclass.com)
Tips from a working artist
From Sujith Puthran, artist and founder: what I actually do at the easel.
I make the study at thumbnail size first. If the design doesn't hold at two inches wide, no amount of rendering will save it at twenty.
Decide where your darkest dark and lightest light live before anything else. A study with the accents in the wrong place is worse than no study.
Print the numbered view and pin it next to the canvas; checking “what value is this region supposed to be?” takes two seconds and keeps the whole painting keyed.
When a shape sits exactly on a threshold, assign it by design, not measurement: ask which side makes the better composition.
Working in graphite, the Value-to-Pencil Grade Mapper labels each value region with the pencil grade that makes it.
Common mistakes, and the fix
The 3 mistakes below are too many steps, texture left to set the shapes, and trust in even breaks.
Starting with too many steps
Seven or more steps look close to the photo and teach little. Begin with 3 or 4 Value steps, get the big pattern right, and add steps only where the painting needs them.
Letting texture set the shapes
Grass, hair and brickwork break a study into confetti. Raise Simplify before anything else, then set a Minimum shape size so specks merge into their neighbours.
Trusting even breaks
Evenly spaced breaks often cut through the middle of an important shape. Press “Fit to image”, or drag the handles on the histogram so each break falls between the picture's own value masses.
Why your picture stays on your device
The Value Study is a program your browser downloads and runs by itself. When you choose a picture, the browser reads it from your files and does the work on your own phone or computer; no copy is sent to this site or to anyone else, and what you export is saved straight from the browser. That is why there is nothing to upload and nothing to sign up for. The privacy page says what the site does collect.
Questions about the Value Study Maker
The 6 questions below begin with the method, the number of steps and the word posterize, then turn to noise, the PDF and privacy.
The method
How many value steps should I use?
Use four or five value steps for most paintings.
What does posterize mean?
To posterize means to map every pixel to the nearest of a small set of flat tones instead of a continuous gradient. On a photo it looks like screen-print layers; for a painter it reveals the big shapes of light and dark that the picture is built from.
Using it
Why do my posterized photos look noisy or speckled?
Your posterized photos look noisy or speckled because photographs carry value noise (texture, grain, sparkle) that jumps across thresholds and shatters shapes into specks. Raise the Simplify control to smooth the values before they are banded, and set a Minimum shape size to merge the remaining islands.
Which view does the PDF print?
The printable PDF and the first page of the stencil pack print the view on screen (Greys, Outlined, Numbered or Color masses) under the value legend. The stencil sheets that follow are always dark shapes on white.
Is this the same as the Value Checker?
No, this is not the same as the Value Checker; the two work together. The value checker shows a continuous grayscale and reads exact values at any point; the Value Study Maker reduces the image to a few flat steps for planning. A common workflow is: study first to plan, checker later to verify mixes.
Does the Value Study Maker upload my photo?
No, the Value Study Maker does not upload your photo.
Drop in a reference and settle its light and dark shapes before the first brushstroke.
Free · No sign-up · Runs in your browser
Why next: Read the exact value of any point in the reference when a step looks wrong.
Why next: Reduce the study to two or three values to test the design underneath it.
Why next: Simplify the photo first when its detail keeps breaking the steps apart.
Last updated 2026-09-28 · Built by Sujith Puthran