Free Drawing Accuracy Checker
Overlay a photo of your drawing on the reference and see exactly where the proportions drifted, before you've rendered for hours. Exports PNG. Free, with no sign-up, and your picture never leaves your device.
1 · Reference photo
Drop an image here, or paste from clipboard
2 · Your drawing
Drop an image here, or paste from clipboard
A phone photo of the drawing works: the paper is found and straightened automatically.
2 points or 4 points.Matching points sets the alignment. Two landmarks fix scale, rotation and position; four also correct perspective.
Six compare modes.Switch between Drift, Overlay, Difference, Edges, Flicker and Mirror without aligning again.
Drawing opacity slider.In Overlay, Drawing opacity ghosts your drawing over the reference from 0 to 100 percent in 5 percent steps.
Drift map and score.Arrows and named areas show where your lines drifted, with a score you can save in this browser.
- Free
- No sign-up
- Runs in your browser: your image never leaves your device
What is a drawing accuracy checker?
A drawing accuracy checker aligns a photo of your drawing onto its reference so the two are compared directly, revealing proportion and placement errors. This one aligns automatically or from landmarks you click, measures how far each part drifts, and offers six views, from a drift map to Mirror.
How to use the Drawing Accuracy Checker
The tool takes 6 steps, all on your device.
Load your reference photo on the left and a photo or scan of your drawing on the right. Nothing leaves your device.
The drawing is lined up with the reference automatically: the paper is found and straightened, then its contours are matched to the reference's.
If the match looks off, choose Align by points and click two landmarks (straight photo) or four corners of the same rectangle (angled photo): first on the reference, then on your drawing.
Read the Accuracy panel and the Drift view: arrows show where each part of your lines sits relative to the reference, and the largest drifts are named. Save the score to track progress.
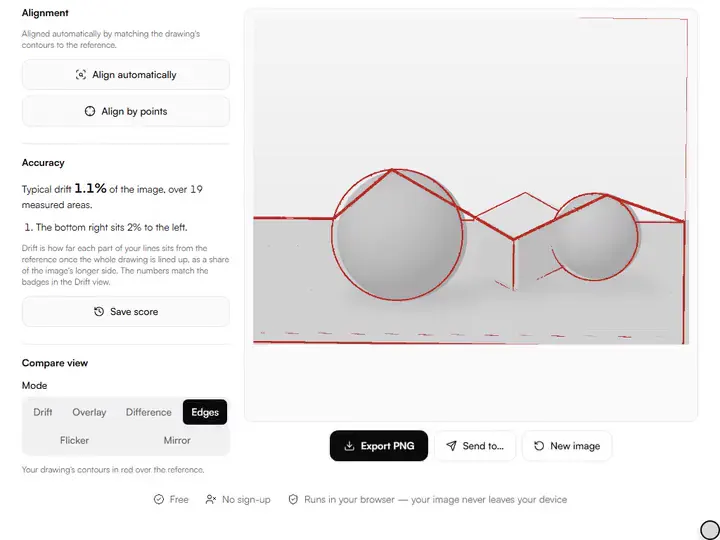
Compare in the other views: Overlay ghosts one over the other, Difference lights up value disagreements, Edges compares contours, Flicker makes errors wobble, Mirror gives fresh eyes.
Export the overlay as a PNG to keep with your notes, then go fix the big shapes first.
What the Drawing Accuracy Checker does
The Drawing Accuracy Checker aligns two photos by paired landmarks, then compares values and contours separately.
Landmark alignment
Alignment warps your drawing into the reference's frame before any comparison happens: automatically, by finding the paper and matching contours, or from two landmarks (similarity transform) or four (homography). Photo scale, tilt and camera angle stop posing as drawing errors, and that shared frame lets the checker compare value masses as well as contours, which places it among the value and tone tools for artists.
Values and contours, separately
The Difference view subtracts the two images' luminance and multiplies the gap by four, so right shapes with wrong values still light up. The Edges view keeps only your drawing's contours, in orange over a pale reference.
Paired, numbered landmarks
The point picker takes landmarks in pairs, reference first and then the same spot on the drawing, and numbers each marker, so landmark 3 on the reference always matches landmark 3 on the drawing.
Bad point sets caught
The alignment step rejects point sets that cannot define a transform and asks for landmarks further apart, instead of showing a distorted overlay.
Settings kept in the link
Matching points, Mode and Drawing opacity are stored in the page address, so a bookmarked link reopens the same view without the photos.
Both photos stay local
The Drawing Accuracy Checker decodes, aligns and compares both images inside the browser, with the edge pass in a Web Worker, and sends neither to a server.
For anyone checking a lay-in against its source
Art students, draughtsmen, beginners and working painters check a lay-in against its source at different stages.
Art students
A cast or figure lay-in photographed at an angle on the easel can be squared by 4-point mode before the Overlay check.
Draughtsmen
The Edges view isolates contour placement, the question sight-size and comparative measurement are meant to answer.
Beginners
Two landmarks, such as the two tear ducts, are enough for Overlay to show whether the features have drifted from the reference.
Working painters
The Difference view checks a block-in's value masses against the reference before glazing or detail work begins.
Why overlay checking beats measuring
Every classical method for checking accuracy (sight-size, plumb lines, proportional dividers, the mirror at the back of the studio) exists because the human eye is a poor absolute measuring instrument but an excellent comparison instrument. You can't reliably judge whether an eye is 3 mm too high; you can instantly see that two overlaid lines don't match.
The check that matters most is also the one beginners skip: big shapes first. An eye drawn beautifully but placed half an inch too high is a worse error than a roughly-drawn eye in the right place, because placement errors compound. Everything you attach to that eye inherits the mistake. Overlay comparison catches placement errors at the lay-in stage, when fixing them costs an eraser stroke instead of a repaint.
Choosing landmarks and point mode
Automatic alignment matches contours, so it needs a drawing of the same subject and framing as the reference. When it cannot lock on, align by points: two far-apart, unambiguous landmarks (tear ducts, opposite corners of a facade), for a straight-on photo.
Four points suit a photo taken at an angle on the easel. Click the corners of the same rectangle in both images, such as the drawing's bounding box, the canvas edge or a taped border. When you want a squared, true-proportion copy of the finished piece to keep or share, the artwork photo straightener applies a four-corner correction to a single photo and saves the result.
How to read each view
Overlay is the workhorse. Ghost your drawing over the reference at around 50% opacity and scan the big contours: silhouette, centerline, brow line, the negative shapes between limbs. Where two versions of the same edge diverge, that's a placement error with a measurable direction and size.
In the Difference view, a portrait with a misplaced jaw lights up along the jaw. Don't chase texture noise. Read the large blobs. The view measures disagreement, not the values themselves; to read any point of a reference or a painting on the 1–10 scale, open the value checker.
Edges is the cleanest read of pure proportion. Flicker swaps the reference and your drawing every 0.6 seconds: anything that wobbles or jumps is misaligned or misdrawn. Mirror flips both images horizontally and shows them side by side, the digital version of the studio mirror; a drawing that looked fine suddenly leans, because your brain stops auto-correcting familiar shapes.
A working routine
Run the check at three moments: after the lay-in (big placement), after the block-in (value masses, in the Difference view), and before calling it finished (Mirror plus Flicker for anything that still nags).
Further reading
The page below goes further into the ideas the Drawing Accuracy Checker works with, and opens on the site named beside it.
- Sight-size and comparative measurement explained (ArtisticMasterclass.com)
Tips from a working artist
From Sujith Puthran, artist and founder: what I actually do at the easel.
Photograph your drawing square-on, filling the frame, in even light. A skewed, shadowed photo adds noise to the comparison: the 4-point mode fixes skew but not bad lighting.
Pick landmarks on bone, not flesh: tear ducts, nostril wings and mouth corners move less between expressions than cheeks or hair.
If the overlay is right in the eyes but wrong at the chin, your drawing has a scale gradient: the classic symptom of measuring locally instead of relating everything to the head's total height.
Use Flicker last. Once the big shapes match, flicker exposes half-line-width errors that overlay mode hides.
Keep the exported overlay PNG next to your easel while you correct: fixing from memory reintroduces the same errors.
For a portrait, the Face Proportion Checker compares eleven points on the reference and on your drawing and names where they differ.
Why your picture stays on your device
The Accuracy Check is a program your browser downloads and runs by itself. When you choose a picture, the browser reads it from your files and does the work on your own phone or computer; no copy is sent to this site or to anyone else, and what you export is saved straight from the browser. That is why there is nothing to upload and nothing to sign up for. The privacy page says what the site does collect.
Questions about the Drawing Accuracy Checker
The 6 questions below deal with alignment, landmarks and a skewed photo, then with the exported file and privacy.
Aligning
How do I check if my drawing's proportions are correct?
To check if your drawing's proportions are correct, photograph your drawing and load it here with your reference. It is aligned automatically, then the Drift view and Accuracy panel show which parts sit too high, low, left or right, as a share of the image.
What's the difference between 2-point and 4-point alignment?
The difference between 2-point and 4-point alignment is perspective: two points correct scale, rotation and position, enough for a straight-on photo. Four points additionally correct perspective, so use them when you photographed your drawing at an angle: click the four corners of the same rectangle in both images.
Which landmarks should I pick?
Pick landmarks that are unambiguous and far apart: the corners of the eyes, the bottom of the chin, or the corners of the paper's border. Far-apart points make the alignment more accurate.
My photo of the drawing is skewed: can it still compare fairly?
Yes, a skewed photo of the drawing can still compare fairly. Automatic alignment finds the paper's edges and straightens them; if it cannot, choose Align by points in 4-point mode and click the four corners of the same rectangle in both images.
Files and privacy
What size is the exported PNG?
The exported PNG matches the reference's working size, at most 1,400 pixels on its long edge. The Mirror view exports twice as wide, because it shows both flipped images side by side.
Does my drawing get uploaded anywhere?
No, your drawing does not get uploaded anywhere. All alignment and comparison runs in your browser. Your reference and drawing never leave your device.
Load a reference and a photo of your drawing, and see where it drifts before any shading begins.
Free · No sign-up · Runs in your browser